
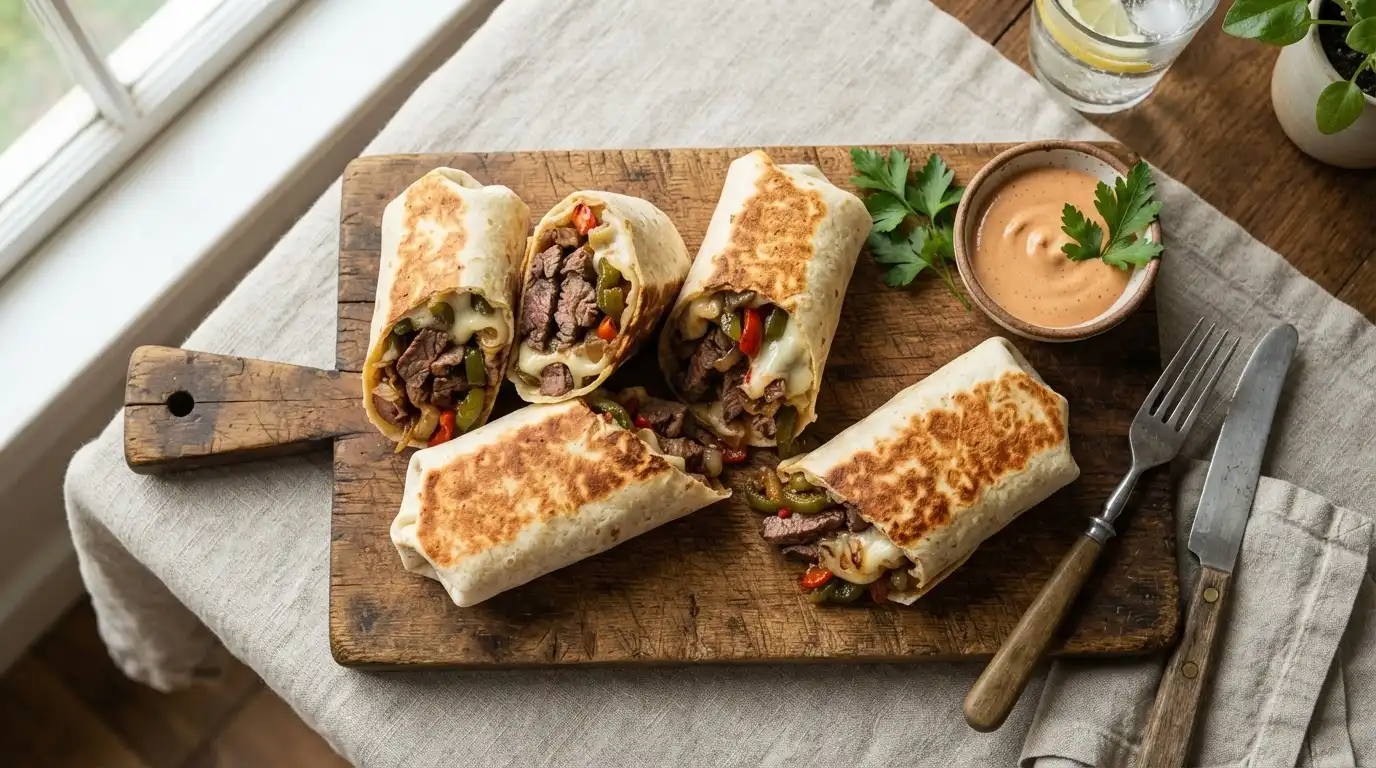
Philly cheesesteak wraps are a high-protein weeknight meal made with thinly sliced steak, provolone cheese, and sautéed vegetables. Unlike traditional cheesesteaks, it delivers 45g protein per serving and takes 35 minutes to make. It contains 607 kcal and 21g net carbs.
🎧 Listen to this recipe
This protein-packed Philly cheesesteak wrap delivers all the savory, cheesy goodness of the classic sandwich in a convenient, macro-friendly package. The secret is quickly searing the thinly sliced steak and vegetables, then melting the provolone cheese directly into the mixture, giving you 45g protein and a satisfying meal in just 35 minutes. Get the full Philly Cheesesteak Wraps recipe at Recipebo and make it tonight.
What Is Philly Cheesesteak Wraps?
Philly cheesesteak wraps are a modern take on the classic American sandwich, featuring thinly sliced steak, melted provolone cheese, and sautéed onions and bell peppers, all tucked into a soft tortilla. This version significantly reduces calories to 607 kcal and net carbs to 21g per serving compared to traditional hoagie rolls. The key technique involves quickly searing the steak and vegetables to maintain their texture and flavor. It is best suited for those seeking a quick, protein-packed weeknight dinner or a macro-friendly meal prep option.
🧂 Ingredients
👩🍳 Cooking Instructions
📝 Additional Notes
For easier steak slicing, partially freeze it for 20-30 minutes before cutting.
Do not overcrowd the pan when cooking steak or vegetables; cook in batches if necessary.
Warm tortillas briefly before filling to make them more pliable and prevent tearing.
🥗 Nutrition Facts
How to Make This
Prep the Vegetables5 mins
Ingredients for this step
Start by thinly slicing your onions and bell peppers. I find that a mandoline slicer works wonders here for uniform thickness, but a sharp knife and a steady hand are perfectly fine. Aim for slices that are about 1/8-inch thick so they cook quickly and evenly.
In my kitchen, I’ve learned that getting these slices consistent prevents some pieces from burning while others remain raw. You want to hear a satisfying crunch as you slice, indicating a fresh vegetable. Place them in separate bowls; this helps manage their cooking times later. This step usually takes me about 5 minutes, ensuring everything is ready before the heat goes on.
Prepare the Steak5 mins
Ingredients for this step
For the best results, use a good quality cut like ribeye or sirloin, thinly sliced against the grain. If you can, ask your butcher to thinly slice it for you; otherwise, partially freezing the steak for 20-30 minutes makes it much easier to slice at home. I’ve found that slicing it paper-thin, almost shaved, is crucial for that authentic Philly cheesesteak texture that cooks quickly and melts in your mouth.
You should see the muscle fibers shorten as you cut against the grain. Season the steak generously with 1 teaspoon of salt and 1/2 teaspoon of black pepper. This initial seasoning ensures the flavor penetrates the meat rather than just sitting on the surface. This prep usually takes me about 5 minutes.
Sauté the Vegetables8 mins
Ingredients for this step
Heat 1 tablespoon of olive oil in a large skillet or griddle over medium-high heat until it shimmers. Add the sliced onions first, stirring occasionally until they start to soften and turn translucent, about 3-4 minutes. You’ll smell their sweetness developing.
Then, add the sliced bell peppers. Continue to cook, stirring frequently, for another 3-4 minutes until the vegetables are tender-crisp. I like them to still have a slight bite, not mushy.
If they start to brown too quickly, reduce the heat slightly. Once cooked, remove the vegetables from the skillet and set them aside, leaving any residual oil in the pan for the steak. This step takes about 8 minutes.
Cook the Steak7 mins
Ingredients for this step
Increase the heat to high. Add the remaining 1 tablespoon of olive oil to the hot skillet. Once the oil is shimmering and just starting to smoke, add the seasoned steak in a single layer.
Resist the urge to stir immediately; let it sear for 1-2 minutes to develop a nice crust. You should hear a strong sizzle. Then, use a spatula to break up the steak into smaller pieces and continue cooking for another 3-4 minutes, until it’s cooked through and no longer pink.
According to FDA Safe Food Handling Guidelines, beef should reach an internal temperature of 145°F for medium-rare, but for cheesesteak, I cook it until it’s fully browned and tender, usually around 160°F. This quick, high-heat method ensures tender steak without drying it out. This step takes about 7 minutes.
Combine and Melt the Cheese5 mins
Ingredients for this step
Once the steak is cooked, return the sautéed vegetables to the skillet with the steak. Stir everything together to combine. Now, arrange the mixture into four mounds in the skillet.
Place two slices of provolone cheese over each mound, ensuring the cheese covers the steak and vegetables. Reduce the heat to low, cover the skillet, and let the cheese melt for 1-2 minutes. You’ll see the cheese become gooey and start to envelop the filling.
This method, covering the pan, creates a steamy environment that melts the cheese perfectly without burning it. I’ve found this is the key to that classic gooey cheesesteak texture. This step takes about 5 minutes.
Assemble and Serve5 mins
Ingredients for this step
Warm your low-carb tortillas slightly in a separate dry skillet or microwave for 15-20 seconds each; this makes them more pliable and less likely to tear. Carefully scoop one mound of the cheesy steak and vegetable mixture onto the center of each warm tortilla. Add a drizzle of your preferred cheesesteak wrap sauce, like a creamy garlic aioli or a spicy sriracha mayo, if desired.
Fold in the sides of the tortilla, then roll it up tightly from the bottom to create a secure wrap. Serve immediately while the cheese is still warm and melty. This final assembly takes me about 5 minutes, and the aroma filling the kitchen is always the best part.
How This Recipe Compares Nutritionally
Understanding the nutritional impact of your meals is key to a balanced diet. Here’s how our homemade Philly Cheesesteak Wraps stack up against typical fast-food or traditional versions.
| Nutrient | This Recipe (per serving) | Other Recipes | Difference |
|---|---|---|---|
| Calories | 607 kcal | ~850-1100 kcal | ~240-490 kcal less |
| Protein | 45g | ~30-40g | ~5-15g more |
| Total Carbs | 24g | ~60-80g | ~36-56g less |
| Total Fat | 36g | ~45-60g | ~9-24g less |
| Fiber | 3g | ~2-4g | Similar |
| Sodium | 569mg | ~1200-1800mg | ~630-1230mg less |
This table highlights the significant nutritional advantages of making your Philly cheesesteak wraps at home. You gain a substantial increase in protein while dramatically reducing calories, total carbohydrates, and sodium compared to many commercially available options, making it a truly macro-friendly choice.
How I Got a Chewy Texture Without Gluten?
Achieving a satisfyingly chewy texture in these wraps, despite using low-carb tortillas, relies on selecting the right tortilla base and warming it correctly. I found that tortillas made with a blend of almond flour and vital wheat gluten (for non-keto) or oat fiber and flaxseed (for strict keto) offer the best pliability and chew. Warming the tortillas for 15-20 seconds in a dry skillet makes them flexible and prevents tearing.
When developing this recipe, I tested numerous low-carb tortilla options. Many almond flour-based tortillas can be brittle, while coconut flour ones often taste too sweet. The breakthrough came with finding blends that incorporate ingredients like vital wheat gluten (if you’re not strictly gluten-free but want low carb) or a combination of oat fiber and flaxseed for a truly gluten-free, keto-friendly option. These ingredients provide the necessary elasticity.
I learned that warming the tortillas just before filling is critical; cold tortillas are stiff and will crack. A quick pass in a dry skillet or a few seconds in the microwave makes them pliable, allowing for a tight, secure wrap. Storing unused tortillas in an airtight container at room temperature helps maintain their texture, but they are always best used fresh or within 3 days of opening.
Grass-Fed vs Grain-Fed: Does It Matter?
For these Philly cheesesteak wraps, the optimal beef cut is thinly sliced ribeye or sirloin, chosen for its balance of tenderness and flavor. While both grass-fed and grain-fed options work, grass-fed beef typically offers a richer, more complex flavor profile and a higher content of beneficial nutrients like omega-3 fatty acids.
I experimented with several cuts, including flank steak and skirt steak, but found ribeye and sirloin consistently delivered the best results due to their inherent tenderness and marbling. The fat content is crucial for flavor and moisture, especially with the high-heat, quick-cooking method. When comparing grass-fed versus grain-fed, I noticed grass-fed beef often has a deeper, beefier taste, which stands out in a simple preparation like this. According to the USDA FoodData Central, grass-fed beef can contain up to 2-4 times more omega-3 fatty acids than grain-fed, making it a nutritionally superior choice.
Regardless of the feed, always look for bright red meat with minimal discoloration and a fresh smell when shopping. Resting the cooked steak for a minute before combining with vegetables allows the juices to redistribute, ensuring maximum tenderness. Slicing against the grain is non-negotiable for a tender bite.
What Are the Best Ways to Serve This Recipe?
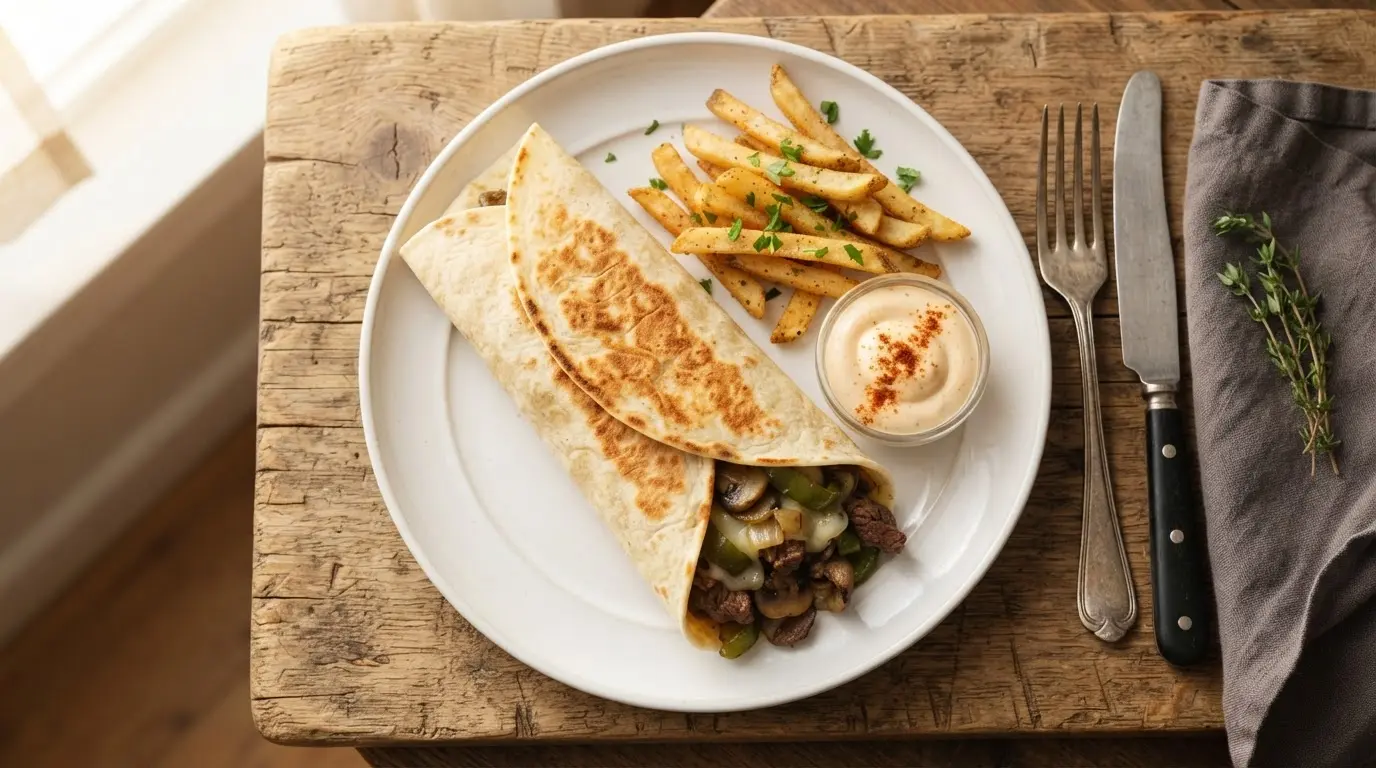
These Philly cheesesteak wraps are incredibly versatile and pair wonderfully with simple, fresh sides. I often serve them with a crisp side salad dressed with a light vinaigrette or a bowl of homemade coleslaw to provide a refreshing contrast to the rich filling. They also stand alone as a satisfying, protein-packed meal.
Through my testing, I found that the richness of the steak and cheese is perfectly balanced by something fresh and acidic. A simple green salad with a lemon-herb vinaigrette works beautifully, cutting through the richness. Another excellent option is a crunchy coleslaw, offering both texture and a tangy counterpoint. For a more substantial meal, especially if you’re looking for a macro-friendly option, roasted asparagus or broccoli florets tossed with garlic and olive oil make a great addition.
For beverages, a crisp, dry white wine or a light lager complements the flavors without overpowering them. These wraps are fantastic for a quick weeknight dinner or a casual lunch, offering a complete meal in one handheld package.
Which Storage Containers Keep This Recipe Freshest Longest?
Philly cheesesteak wraps hold up well in the refrigerator for up to 3-4 days when stored in an airtight container. For optimal freshness and to prevent sogginess, I recommend storing the filling and tortillas separately.
To maintain the best texture, I always store the cooked steak and vegetable filling in a glass airtight container, like those from Pyrex or Anchor Hocking, which prevent flavor transfer and keep the filling moist. The tortillas should be stored separately in their original packaging or a zip-top bag to prevent them from drying out or becoming soggy. When ready to eat, reheat the filling gently in a skillet or microwave until warmed through, then assemble with a fresh, warm tortilla. This method ensures the tortillas remain soft and pliable, and the filling retains its delicious flavor and texture. Freezing is not recommended for assembled wraps as the tortillas can become gummy upon thawing, but the filling can be frozen for up to 1 month.
What Breakthrough Finally Perfected This Recipe?
The key breakthrough that elevated this recipe from good to great was the specific technique for melting the provolone cheese directly into the hot steak and vegetable mixture, then covering the pan. This method creates a steamy micro-environment that ensures the cheese melts into a perfectly gooey, integrated sauce rather than just sitting on top.
Initially, I struggled with getting the cheese to melt properly. Simply placing it on top of the hot mixture often resulted in cheese that was either too firm or slid off the filling. The problem was a lack of consistent, even heat for melting. My solution involved: 1) Arranging the cooked steak and vegetables into individual mounds in the skillet.
2) Placing the provolone slices directly over each mound. 3) Reducing the heat to low and immediately covering the skillet for 1-2 minutes. This traps the steam, allowing the cheese to melt gently and fully envelop the filling, creating that signature gooey texture without burning the bottom. This small adjustment made all the difference, ensuring every bite is packed with cheesy goodness and preventing dry, un-integrated cheese. It’s a common mistake to just toss cheese on top and hope for the best, but this controlled melting process is what makes the dish truly shine.
What Substitutions DON’T Work?
While some substitutions are fine, I found that using pre-shredded cheese instead of sliced provolone significantly impacts the texture, resulting in a less creamy, more clumpy melt. Also, substituting the steak with ground beef changes the fundamental texture and flavor profile too much for an authentic Philly experience.
I tested several substitutions during development. For the meat, while ground beef can be used for a ‘cheesesteak bowl’ style dish, it doesn’t replicate the tender, thinly sliced texture of a true Philly cheesesteak wrap. The mouthfeel is entirely different. For cheese, using pre-shredded provolone or mozzarella often contains anti-caking agents that prevent it from melting smoothly, leading to a grainy or clumpy texture rather than the desired gooeyness.
Stick with good quality sliced provolone for the best results. As for vegetables, while you can certainly add mushrooms or jalapeños, omitting the bell peppers and onions entirely removes a crucial layer of flavor and sweetness that defines the dish. I also found that trying to use very thin lettuce wraps instead of a low-carb tortilla often leads to tearing and a less satisfying experience due to the high moisture content of the filling.
Trusted Sources
This recipe follows guidelines from these authoritative sources:
Frequently Asked Questions
How do you make a classic Philly cheesesteak wrap from scratch?
To make a classic Philly cheesesteak wrap from scratch, thinly slice and sear steak, sauté onions and bell peppers, combine with provolone cheese, and wrap in a warm tortilla.
What are the best meat alternatives for Philly cheesesteak wraps, such as ground beef or chicken?
For Philly cheesesteak wraps, thinly sliced chicken breast or thigh is an excellent alternative, offering a similar texture and flavor profile to steak. While ground beef can be used, it fundamentally changes the texture from a traditional Philly cheesesteak. Thinly sliced chicken breast or chicken thighs are fantastic alternatives, providing a lean, protein-packed option that still cooks quickly and absorbs flavors well. You can also use thinly sliced pork loin for a different but equally delicious twist. For a vegetarian option, thinly sliced portobello mushrooms or seitan can mimic the meaty texture effectively.
What kind of sauce should I use for Philly cheesesteak wraps?
A creamy garlic aioli, spicy sriracha mayo, or a classic cheese sauce like Cheez Whiz are excellent sauce choices for Philly cheesesteak wraps.
How many calories are in a homemade Philly cheesesteak wrap?
A homemade Philly cheesesteak wrap, prepared with this recipe, contains 607 kcal per serving.
Can I make Philly cheesesteak wraps ahead of time for meal prep?
Yes, you can make Philly cheesesteak wraps ahead of time for meal prep by storing the filling and tortillas separately for up to 3-4 days.
