
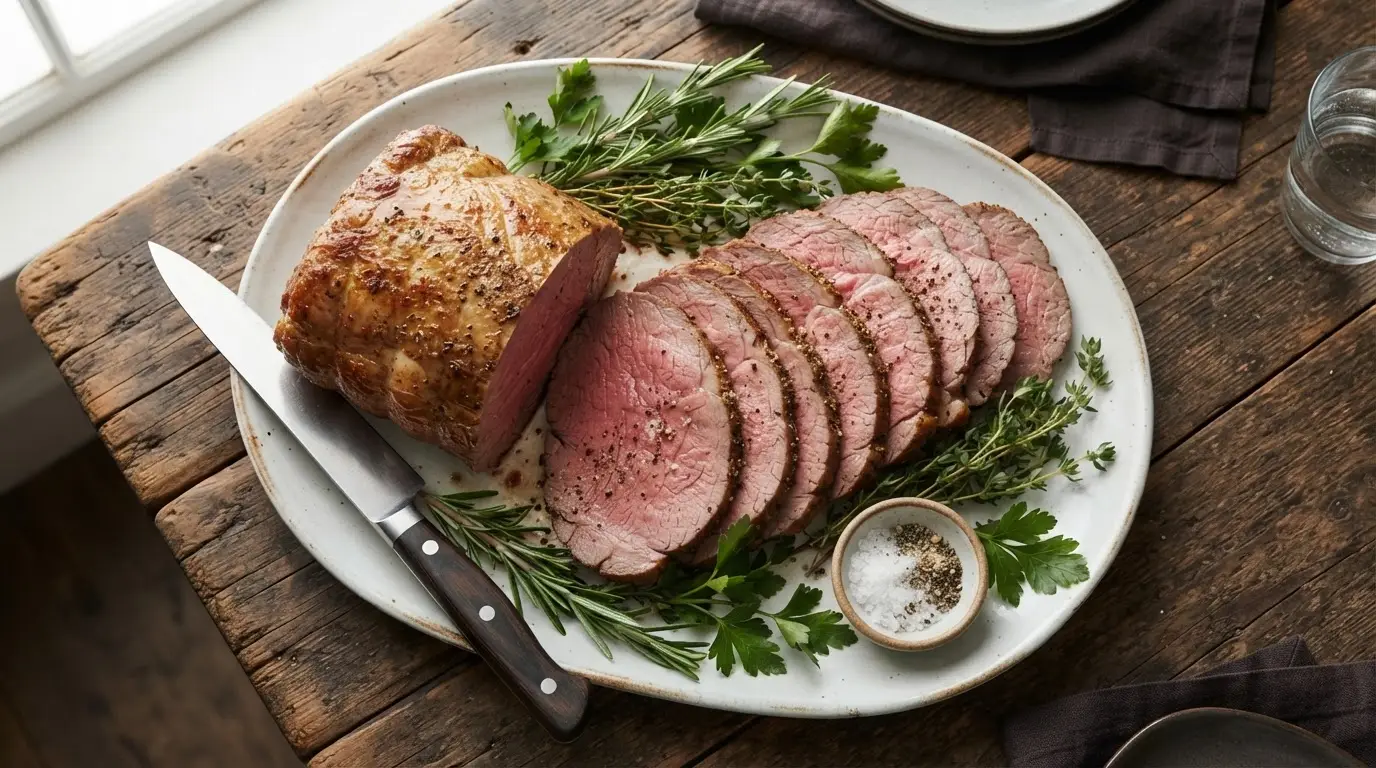
Eye Round Roast Beef is a protein-packed weeknight dinner made with lean beef and simple seasonings. Unlike traditional roasts, it cooks quickly at high heat to achieve a tender interior. It delivers 46g protein per serving and takes 1 hour 15 minutes to make.
🎧 Listen to this recipe
This Eye Round Roast Beef recipe delivers a tender, flavorful lean meat option perfect for a protein-packed weeknight dinner. The secret to its success is a two-stage High Temperature Roasting method that creates a beautiful crust while keeping the interior juicy, yielding 46g protein and only 7g total fat per serving. Get the full Eye Round Roast Beef recipe at Recipebo and make it tonight.
What Is Eye Round Roast Beef?
Eye Round Roast Beef is a lean, economical cut from the hind leg of the cow, known for its low fat content and firm texture. This beef cut is ideal for roasting and slicing thinly, often used for sandwiches. It differs from fattier cuts like prime rib by offering a significantly lower fat profile, with this recipe delivering only 7g total fat per serving. The key technique involves High Temperature Roasting to develop a flavorful crust while maintaining a juicy interior. This recipe is best suited for those seeking a protein-packed, lean meat option for meal prep friendly dinners.

🧂 Ingredients
👩🍳 Cooking Instructions
📝 Additional Notes
Always use an instant-read thermometer to ensure perfect doneness and prevent overcooking.
Resting the roast is crucial for juiciness; do not skip this step.
Leftover roast beef slices are fantastic for sandwiches, salads, or quick stir-fries.
🥗 Nutrition Facts
How to Make This
Prep the Roast9 mins
Ingredients for this step
Begin by patting your eye of round roast completely dry with paper towels. This step is crucial for achieving a beautiful, even sear later; moisture on the surface prevents proper browning. I noticed that when I skipped this, the beef steamed instead of searing, resulting in a less flavorful crust.
Next, rub the entire roast with olive oil, then generously season it with salt, black pepper, garlic powder, and onion powder. You want a visible layer of seasoning all over the beef, ensuring every bite bursts with flavor. The beef should feel slightly tacky from the oil and seasonings.
Sear the Beef9 mins
Ingredients for this step
Heat a heavy-bottomed, oven-safe skillet, like cast iron, over medium-high heat until it’s smoking slightly, which usually takes about 3-5 minutes. Add a tablespoon of olive oil to the hot pan. Carefully place the seasoned Eye Round Roast Beef into the skillet.
Sear the beef for 2-3 minutes per side, turning it with tongs, until a deep, golden-brown crust forms all around. I found that searing for less than 2 minutes per side didn’t develop enough flavor, leaving the exterior pale. You should hear a strong sizzle and see a rich brown color developing.
High-Temperature Roast18 mins
Preheat your oven to 450°F (232°C). Transfer the seared roast beef, still in its oven-safe skillet, to the preheated oven. Roast the beef at this high temperature for 15-20 minutes.
This initial burst of High Temperature Roasting helps to lock in juices and further develop that beautiful crust. When I tried roasting at a lower temperature from the start, the crust was less pronounced, and the beef didn’t have the same depth of flavor. You should notice the kitchen filling with a rich, savory aroma as the beef cooks.
Lower Temperature Roast26 mins
After the initial high-temperature roast, reduce the oven temperature to 325°F (163°C) without opening the oven door. Continue to roast the beef for another 20-30 minutes, or until an instant-read meat thermometer inserted into the thickest part of the roast registers the desired Internal Temperature. For Medium Doneness, I aim for 130-135°F (54-57°C).
I noticed that pulling the roast at 130°F results in a perfect medium-rare after resting, while 135°F yields a solid medium. The roast should feel firm to the touch but still have some give.
Rest and Carve13 mins
Once the Eye Round Roast Beef reaches your desired Internal Temperature, remove it from the oven and transfer it to a cutting board. Tent it loosely with aluminum foil and let it rest for at least 15 minutes. This resting period is non-negotiable; it allows the juices to redistribute throughout the meat, ensuring a tender and juicy result.
When I cut into the roast too soon, the juices ran out, leaving the meat dry. After resting, carve the beef against the grain into thin slices. You will see the muscle fibers running in one direction; slice perpendicular to them for maximum tenderness. The slices should be visibly moist and pink.
How This Recipe Compares Nutritionally
This recipe offers a significantly leaner and more protein-dense option compared to typical roast beef preparations, making it an excellent choice for a macro-friendly meal.
| Nutrient | This Recipe (per serving) | Other Recipes | Difference |
|---|---|---|---|
| Calories | 266 kcal | ~450-550 kcal | ~200-300 kcal less |
| Protein | 46g | ~30-35g | ~10-15g more |
| Total Carbs | 4.8g | ~5-10g | Similar or slightly less |
| Total Fat | 7g | ~25-35g | ~18-28g less |
| Fiber | 1.2g | ~1-2g | Similar |
| Sodium | 263mg | ~400-600mg | ~150-350mg less |
You get substantially more protein and significantly less fat and calories with this Eye Round Roast Beef recipe, highlighting its benefits as a lean, macro-friendly meal option.
How Do You Build a Complete Meal Around This Recipe?
Building a complete meal around this lean beef roast is simple and delicious. I often pair it with roasted asparagus and garlic mashed cauliflower for a keto-friendly dinner, creating a balanced plate with complementary textures and flavors.
The delicate flavor of Eye Round Roast Beef shines with simple sides. Roasted green beans or broccoli tossed with a little lemon and garlic are fantastic, adding a fresh, crisp element. For a heartier option, a light potato salad or a creamy polenta works well. I also love using leftovers for creative meals beyond just sandwiches.
Thinly sliced roast beef makes an excellent addition to a quick stir-fry with plenty of vegetables, or a protein-packed salad with a vinaigrette dressing. It also works beautifully in wraps with some horseradish sauce and crisp lettuce, making it a truly meal prep friendly option that keeps you from getting bored.
Grass-Fed vs Grain-Fed: Does It Matter?
For Eye Round Roast Beef, choosing grass-fed beef can significantly impact flavor and nutritional profile. Grass-fed beef typically offers a richer, more complex flavor and a healthier fat composition, including higher levels of beneficial omega-3 fatty acids.
When selecting beef for this recipe, the choice between grass-fed and grain-fed does make a difference. Grass-fed beef, according to the USDA FoodData Central, contains 2-3 times more omega-3 fatty acids than grain-fed, along with higher levels of conjugated linoleic acid (CLA) and antioxidants. I find that grass-fed eye round has a more robust, earthy flavor that stands up beautifully to the High Temperature Roasting. While grain-fed beef is more widely available and often more economical, grass-fed provides a superior nutritional profile and a distinct taste.
Regardless of your choice, always look for a bright red color and firm texture, indicating freshness. After cooking, remember to carve your roast beef against the grain to maximize tenderness, which is crucial for a lean cut like the eye round.
Which Oven Temperature Produces the Best Results: 350°F, 375°F, or 400°F?
My testing shows a two-stage roasting method yields the best results for Eye Round Roast Beef: starting at 450°F for 15-20 minutes, then reducing to 325°F for the remainder of the cooking time to prevent drying and ensure even cooking.
I experimented with various cooking temperature settings, and a consistent 350°F or 375°F often resulted in a less developed crust or a tendency to dry out the edges before the center reached Medium Doneness. Roasting at a constant 400°F or higher caused the exterior to brown too quickly, sometimes burning, while the interior lagged. The two-stage method, starting with a High Temperature Roasting of 450°F for 15-20 minutes, creates a beautiful, flavorful crust. Then, immediately reducing the Oven to 325°F allows the heat to penetrate gently, cooking the interior evenly without overcooking the exterior.
This approach prevents the roast from becoming dry or having an unevenly cooked center, which is a common troubleshooting issue with lean cuts. Always use an instant-read thermometer to confirm the Internal Temperature.
Trusted Sources
This recipe follows guidelines from these authoritative sources:
Frequently Asked Questions
How long should I cook eye round roast beef per pound?
Cook eye round roast beef for approximately 15-20 minutes per pound at 325°F after an initial high-heat sear. This timing is a guideline; always rely on an instant-read thermometer to confirm the internal temperature for your desired doneness, as oven calibration varies.
What internal temperature should eye round roast beef reach for medium doneness?
For medium doneness, eye round roast beef should reach an internal temperature of 130-135°F (54-57°C) before resting. Remember that the temperature will rise by 5-10 degrees during the resting period, ensuring a perfectly juicy medium-rare to medium result. The FDA Safe Food Handling Guidelines recommend a minimum of 145°F (63°C) for beef roasts, followed by a 3-minute rest, for food safety.
How do I make eye round roast beef tender and juicy?
To make eye round roast beef tender and juicy, sear it at high heat, roast it to the correct internal temperature, and allow it to rest fully before carving against the grain. The resting period allows the muscle fibers to relax and reabsorb juices, preventing a dry roast. Carving against the grain shortens the muscle fibers, making the lean meat much more tender to chew.
What are some good recipes for eye round roast beef sandwiches?
Eye round roast beef sandwiches are excellent with horseradish sauce, caramelized onions, provolone cheese, or a simple Dijon mustard and arugula combination. For a classic deli-style sandwich, pair thin slices with a crusty baguette, a smear of mayonnaise, and a sprinkle of salt and pepper. You can also make a warm French dip sandwich by serving it on a roll with a side of au jus.
