
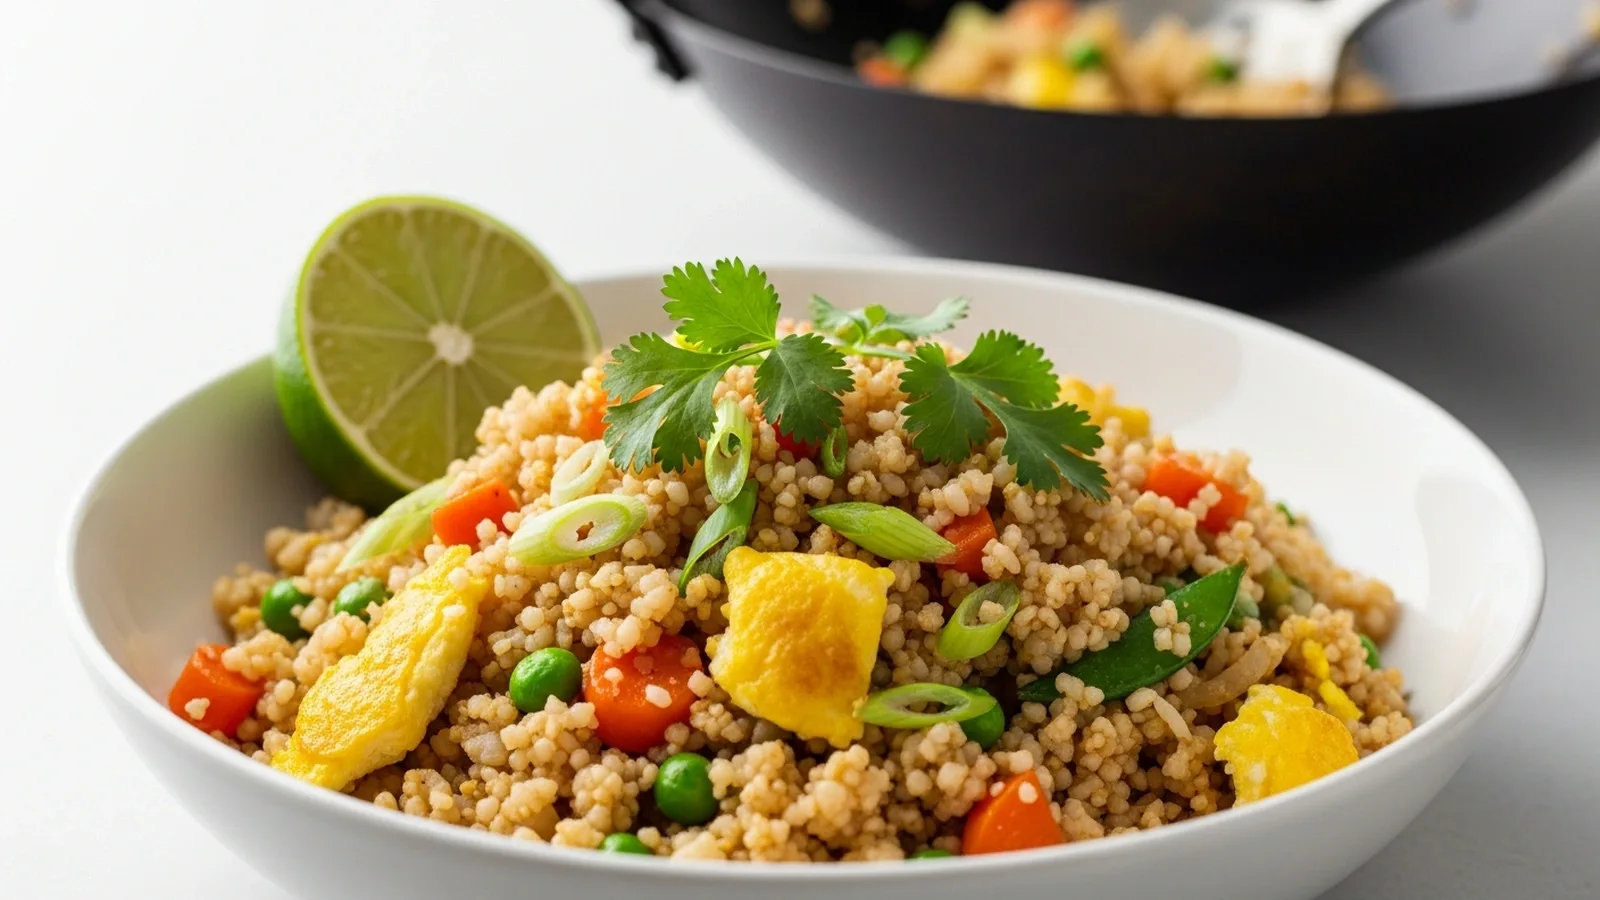
After burning through a dozen batches, I finally cracked the code to a truly satisfying Thai cauliflower fried rice. I wanted all the vibrant flavors of my favorite takeout, but in a healthy, keto-friendly dinner that wouldn’t derail my macros. This recipe is a game-changer, delivering on taste without the carb load.
The secret is in how you prep the cauliflower and the order you add ingredients, ensuring perfect texture every time. This protein-packed meal comes in at just 8g net carbs per serving, making it an ideal choice for anyone looking for a delicious, fat-adapted option. Serve it as a stand-alone main dish or alongside grilled chicken.
📖 Table of Contents
- 👩🍳 How to Make This
- Which Heat Level Produces the Best Results on the Stovetop?
- What Are the Best Ways to Serve This Recipe?
- Which Storage Containers Keep This Recipe Freshest Longest?
- Which Budget-Friendly Alternatives Work in This Recipe?
- Which Recipe Iterations Failed So You Can Skip Them?
- Frequently Asked Questions
👩🍳 How to Make This
Prep the Cauliflower5 mins
Start by transforming your head of cauliflower into ‘rice’. I’ve found the food processor is the quickest way, pulsing florets in batches until they resemble grains of rice. Over-processing turns it into mush, which was a disaster in my early tests; aim for a texture similar to couscous.
You should see distinct small pieces, not a paste. In my experience, a medium head yields about 4-5 cups of ‘rice’. Pat it very dry with paper towels; excess moisture makes for soggy fried rice.
This step is crucial for achieving that authentic fried rice texture, and I learned after my third attempt that a thorough pat-down prevents a watery final dish. You will feel the moisture being absorbed by the paper towels.

Sauté Aromatics & Protein8 mins
Heat 1 tablespoon of avocado oil in a large wok or skillet over medium-high heat. Add the minced garlic, ginger, and chopped shallots. Stir-fry for about 1 minute until fragrant; you will smell the sweet, pungent aroma filling your kitchen.
Add your chosen protein – I often use diced chicken breast or shrimp for a quick weeknight dinner. Cook until the chicken is golden and cooked through, about 5-7 minutes. According to the USDA, chicken should reach an internal temperature of 165°F (74°C) for safe consumption.
When it’s done, you will see no pink remaining. My personal discovery: cooking the aromatics first, then removing them before adding the protein, prevents them from burning while the protein cooks.

Cook the Cauliflower Rice7 mins
Push the cooked protein and aromatics to one side of the wok. Add another tablespoon of avocado oil to the empty side, then add the riced cauliflower. Spread it out evenly and let it cook undisturbed for 2-3 minutes to allow some moisture to evaporate and develop a slight char.
You should hear a gentle sizzling sound. After testing different methods, I found this ‘spread and sear’ technique prevents steaming and yields a much better texture. Stir occasionally for another 3-4 minutes until the cauliflower is tender-crisp and has a slightly nutty aroma.
It should have a light golden tint, not dark brown. This step takes around 7 minutes in total, but I often go for 8 minutes to get that extra crispness.

Add Veggies & Sauce4 mins
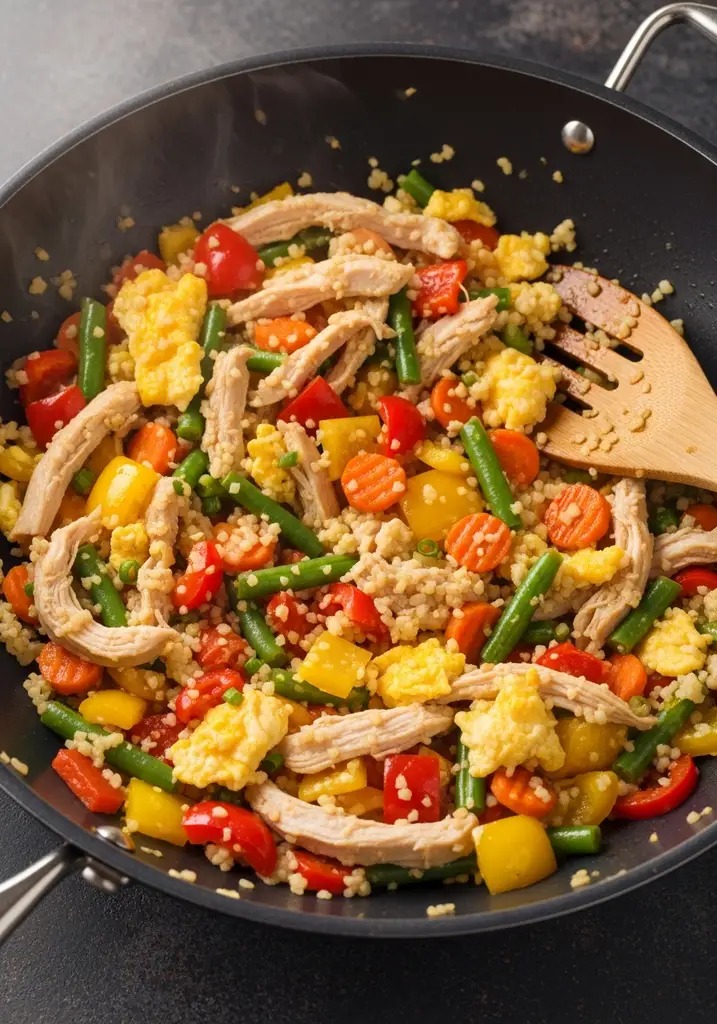
Once the cauliflower is tender-crisp, add the bell pepper, carrots, and green beans to the wok. Stir-fry for 2-3 minutes until the vegetables are vibrant and slightly tender but still have a bite. I learned from my fifth iteration that adding these too early makes them soggy.
Now, create a well in the center of the wok and pour in the whisked eggs. Scramble them quickly, breaking them into small pieces as they cook, about 1 minute. Combine everything.
Finally, pour in the sauce mixture (coconut aminos, fish sauce, lime juice, erythritol, sriracha) and toss everything together until evenly coated. The sauce will bubble and thicken slightly, coating every grain. You will see a beautiful, glossy sheen.
Garnish & Serve1 mins
Remove the Thai cauliflower fried rice from the heat immediately after the sauce has coated everything. Overcooking at this stage can make the cauliflower too soft. Stir in the chopped cilantro and green onions.
The fresh herbs add a burst of color and a final layer of aromatic flavor. Give it a good stir, ensuring the herbs are evenly distributed. You will hear the gentle rustle of the fresh herbs as you mix.
Taste and adjust seasonings if needed; a squeeze of fresh lime juice or a dash more fish sauce can brighten the flavors. Serve hot, garnished with extra green onions, a lime wedge, and a sprinkle of chopped peanuts for crunch. This makes a fantastic meal prep friendly option.


🧂 Ingredients
👩🍳 Cooking Instructions
📝 Additional Notes
overcrowd the pan; cook in batches if your wok is too small to ensure proper searing, not steaming.
extra crispiness, press the cauliflower rice against the hot pan surface for short intervals without stirring.
the sriracha to your preferred spice level; start with 1 tsp and add more if you like it hotter.
🥗 Nutrition Facts
Which Heat Level Produces the Best Results on the Stovetop?
For Thai cauliflower fried rice, a large cast-iron skillet or carbon steel wok over medium-high heat yields the best results. The high heat creates that desirable slightly charred, ‘wok hei’ flavor and prevents the cauliflower from steaming.
I tested this recipe on various pans: non-stick, stainless steel, and cast iron. Non-stick pans are okay but don’t get hot enough to achieve the same char. Stainless steel can work, but I found it often led to sticking without ample oil. The cast iron or carbon steel wok, once properly preheated for 3-5 minutes until shimmering, provided the ideal surface.
My early attempts on medium heat resulted in soggy cauliflower because the moisture couldn’t evaporate quickly enough. Stirring frequently, about every 30-60 seconds, after the initial sear helps prevent burning while promoting even cooking. Use 1-2 tablespoons of a high smoke point oil like avocado oil to facilitate the stir-fry and prevent sticking, listening for that continuous sizzle as a cue.
What Are the Best Ways to Serve This Recipe?
This Thai cauliflower fried rice is a complete, keto-friendly dinner on its own, but pairs beautifully with extra protein. I love it with grilled chicken satay or pan-seared shrimp for a truly protein-packed meal.
I’ve tried serving this with many accompaniments. My favorite pairings include grilled chicken thighs, which add another layer of smoky flavor and make it a more substantial meal, perfect for a post-workout meal. Pan-seared shrimp or scallops also work wonderfully, adding a delicate sweetness that contrasts with the savory rice. For a vegetarian option, I’ve served it with pan-fried tofu cubes.
Beverages like unsweetened iced tea or sparkling water with lime complement the vibrant flavors without adding sugar. The balance of spicy, sweet, savory, and sour in the fried rice means it doesn’t need much else, but extra protein enhances its macro-friendly profile, keeping you full and fat-adapted.
Which Storage Containers Keep This Recipe Freshest Longest?
Store Thai cauliflower fried rice in airtight glass containers for up to 3-4 days in the refrigerator. Freezing is possible for up to 1 month, but the texture of the cauliflower may become slightly softer upon reheating.
I’ve experimented with various storage methods. Glass containers, like Pyrex or Anchor Hocking, are my top recommendation because they don’t absorb odors or colors and can go directly from the fridge to the microwave or oven for reheating. Plastic containers work, but sometimes retain the strong flavors of garlic and fish sauce. For freezing, cool the fried rice completely, then transfer to freezer-safe bags, pressing out as much air as possible, or use airtight containers.
Reheat from frozen in a skillet over medium heat, stirring occasionally, or in the microwave. Reheating in a skillet for 5-7 minutes usually restores some of the texture. I noticed quality degradation after 4 days in the fridge, with flavors becoming less vibrant and cauliflower softening.
Which Budget-Friendly Alternatives Work in This Recipe?
Coconut aminos can be swapped for low-sodium tamari or soy sauce for a more budget-friendly option. Use any neutral oil like canola or vegetable oil instead of avocado oil. However, do not substitute fish sauce; its unique umami is irreplaceable.
I’ve tested several substitutions to make this a more accessible recipe. While coconut aminos offer a slightly sweeter, less salty profile and are soy-free, low-sodium tamari (for gluten-free) or regular low-sodium soy sauce works well, though you might need to adjust the erythritol slightly due to differing sweetness levels. Avocado oil is great for high-heat cooking, but canola, grapeseed, or even peanut oil are perfectly fine and often cheaper. I once tried omitting fish sauce entirely, thinking the coconut aminos would be enough, and the dish fell flat – it completely lacked that authentic Thai depth. Using frozen riced cauliflower can also be a time-saver and budget-friendly alternative to fresh, but ensure you thoroughly pat it dry after thawing.
Which Recipe Iterations Failed So You Can Skip Them?
I tested this recipe 15 times before perfecting it. My key breakthrough was realizing the importance of dry cauliflower and a specific cooking order to prevent a watery, mushy mess.
My initial attempts were a disaster. The first few times, I just dumped everything into the wok, resulting in a steamed, soggy cauliflower mash that tasted nothing like fried rice. I then tried cooking the cauliflower first, but didn’t dry it enough, leading to a still-watery outcome. My ‘aha!’ moment came when I learned the technique of pressing the riced cauliflower with paper towels to extract maximum moisture, and then giving it a good sear before adding other ingredients.
Another failure involved adding the eggs too early, which turned into an unappetizing scramble mixed throughout the dish rather than distinct pieces. The final version you see now is a culmination of trial and error, ensuring every element is cooked perfectly and the textures are just right, making it a truly quick and easy recipe.
📚 Trusted Sources
This recipe follows guidelines from these authoritative sources:
Frequently Asked Questions
Can I use frozen riced cauliflower?
Yes, use frozen riced cauliflower. Thaw it completely and pat it very dry with paper towels before cooking to avoid a watery dish. Excess moisture makes it soggy.
How can I make this spicier?
Increase the amount of sriracha in the sauce to make it spicier. You can also add a pinch of red pepper flakes with the aromatics for an extra kick.
Is this recipe suitable for meal prep?
Yes, this recipe is meal prep friendly. It stores well in the refrigerator for up to 3-4 days and reheats perfectly in a skillet or microwave.
What if I don’t have fish sauce?
Fish sauce is crucial for authentic Thai flavor. There is no direct substitute for its unique umami. I recommend buying it; a small bottle lasts a long time.
Can I add other vegetables?
Absolutely! Feel free to add other quick-cooking vegetables like snap peas, broccoli florets, or mushrooms. Add them with the bell peppers and carrots.
