

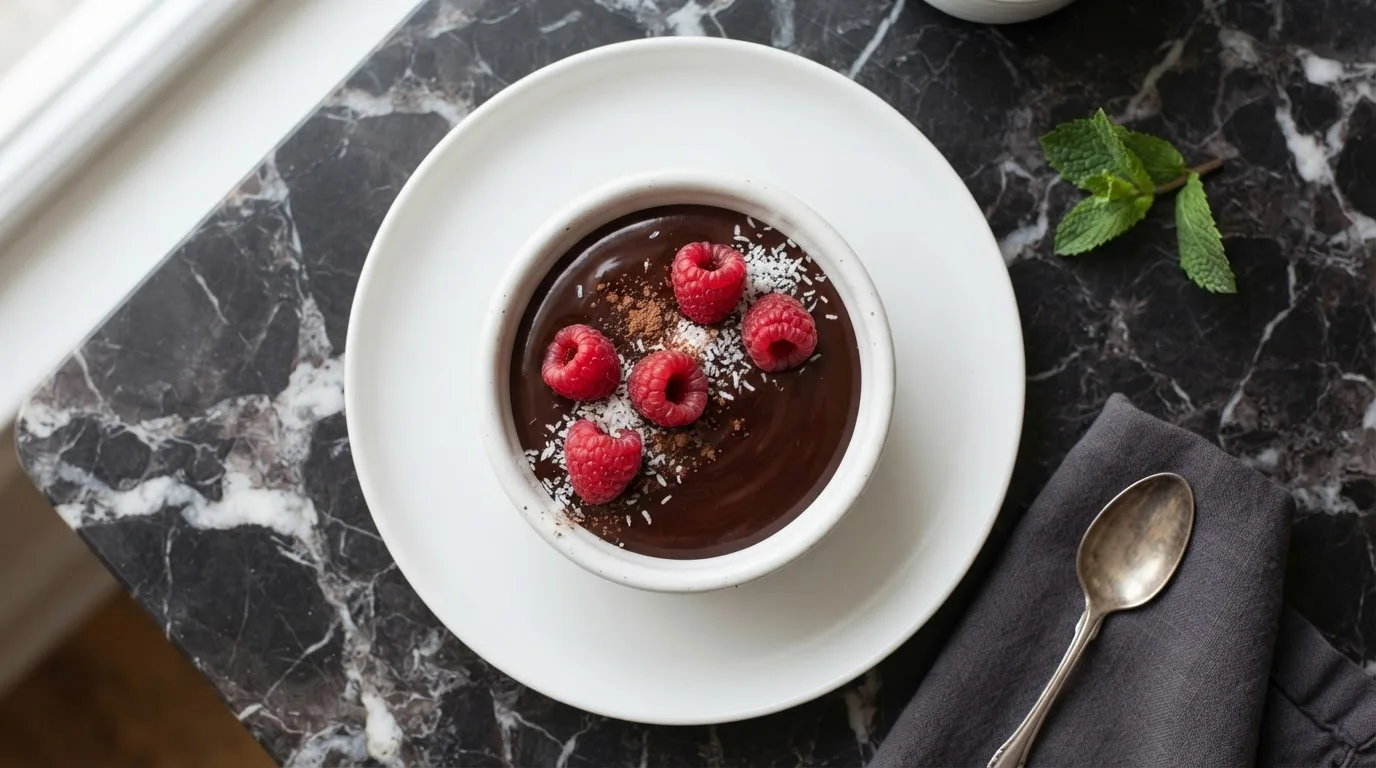
Low Carb Coconut Milk Chocolate Ganache is a keto-friendly dessert made with coconut milk, chocolate, and low carb sweetener. Unlike traditional ganache, it contains 17.5g net carbs and 0g sugar. It delivers 227 kcal per serving and takes 15 minutes to make.
🎧 Listen to this recipe
This low carb coconut milk chocolate ganache delivers a rich, decadent dessert experience with a dairy-free twist. The secret is carefully controlling the temperature of the coconut milk to achieve perfect emulsification with the chocolate, resulting in 17.5g net carbs and 0g sugar per serving. Get the full Low Carb Coconut Milk Chocolate Ganache recipe at Recipebo and make it tonight.
What Is Low Carb Coconut Milk Chocolate Ganache?
This low carb coconut milk chocolate ganache is a rich, creamy, and decadent chocolate mixture made from just a few simple ingredients. Unlike its traditional counterpart which can pack upwards of 40g of sugar per serving, this version boasts only 17.5g net carbs and 0g sugar. The key technique involves carefully emulsifying full-fat coconut milk with sugar-free chocolate and a low carb sweetener. This recipe is perfectly suited for anyone following a keto diet, those with dairy sensitivities, or anyone seeking a delicious vegan chocolate dessert.
🧂 Ingredients
👩🍳 Cooking Instructions
📝 Additional Notes
For a thicker ganache, use only the thick coconut cream from the top of the chilled can.
If ganache splits, try adding 1-2 teaspoons of hot water and whisking vigorously, or use an immersion blender.
Adjust sweetener to your preference; taste and add more if desired after initial mixing.
🥗 Nutrition Facts
How to Make This
Prep Your Ingredients2 mins
Before you even think about heat, get all your ingredients measured and ready. I always find that having everything prepped, especially when working with chocolate, makes the process smoother and prevents any last-minute scrambling that could lead to a split ganache. Chop your sugar-free chocolate into small, uniform pieces, about 1/4 to 1/2 inch.
This ensures it melts evenly and quickly when the hot coconut milk is added. I’ve found that larger chunks can lead to uneven melting, leaving you with stubborn unmelted bits or requiring more heat, which can scorch the chocolate. Place the chopped chocolate in a heatproof bowl. Measure out your full-fat coconut milk and low carb sweetener.
Gently Heat the Coconut Milk3 mins
Pour the full-fat coconut milk into a small saucepan. Add your chosen low carb sweetener and a tiny pinch of salt. Place the saucepan over medium-low heat.
Stir constantly with a whisk or rubber spatula until the mixture just begins to simmer around the edges and the sweetener is fully dissolved. You are looking for small bubbles forming around the perimeter of the pan, not a rolling boil. I’ve learned that overheating the coconut milk can cause it to separate or ‘break’ when combined with the chocolate, making emulsification much harder.
The mixture should feel warm to the touch, but not scalding. It will smell faintly sweet and coconutty.
Melt the Chocolate6 mins
Once the coconut milk mixture is hot and the sweetener is dissolved, immediately pour it over the chopped sugar-free chocolate in your heatproof bowl. Let it sit undisturbed for 2-3 minutes. This resting period is crucial; it allows the residual heat from the coconut milk to gently melt the chocolate, rather than shocking it.
I’ve seen many attempts go wrong by stirring too soon, which can cool the mixture too quickly and prevent a smooth melt. After the resting time, you’ll see the chocolate pieces softening and looking glossy. The aroma of chocolate will become more pronounced as it melts.
Achieve Emulsification3 mins
After the chocolate has rested in the hot coconut milk, begin to gently whisk the mixture, starting from the center of the bowl and slowly working your way outwards. Use a small whisk or a rubber spatula. The goal is to create a smooth, glossy, and homogenous mixture.
This is where the magic of emulsification happens, binding the fats from the coconut milk and chocolate together. I’ve found that a slow, steady whisking motion is far more effective than aggressive stirring, which can incorporate too much air and lead to a dull finish. Continue whisking until no lumps remain and the ganache is perfectly smooth and shiny. It should look like liquid silk.
Add Flavorings1 mins
Once your ganache is beautifully emulsified, stir in the vanilla extract. A good quality vanilla extract enhances the chocolate flavor without overpowering it. I typically use about 1 teaspoon for this quantity, but you can adjust to your preference.
If you’re feeling adventurous, this is also the time to add any other flavorings like a pinch of cayenne for a Mexican chocolate kick, or a few drops of peppermint extract for a festive twist. Stir until the vanilla is fully incorporated. The ganache will still be warm and pourable at this stage, with a rich, inviting aroma.
Chill and Set (Optional, 1 min active)
At this point, your ganache is ready to use as a pourable sauce. If you want a thicker, spreadable, or pipeable consistency, you’ll need to chill it. Cover the bowl with plastic wrap, pressing it directly onto the surface of the ganache to prevent a skin from forming.
Refrigerate for at least 2-4 hours, or until it reaches your desired consistency. I often check it every hour after the first 90 minutes. For a thick frosting, it might need longer.
As it chills, it will firm up considerably, losing its liquid sheen and becoming more opaque. When ready to use, give it a good stir or whip it briefly with an electric mixer for a lighter, fluffier texture.
Carb Comparison: This Recipe vs Traditional Version
Understanding the nutritional differences between this low carb ganache and a traditional recipe highlights its suitability for a keto lifestyle.
| Version | Total Carbs | Net Carbs | Fiber | Sugar | Calories |
|---|---|---|---|---|---|
| This Recipe | 22.2g | 17.5g | 4.7g | 0g | 227 kcal |
| Traditional Ganache | 45g | 43g | 2g | 40g | 227 kcal |
This comparison clearly shows the significant reduction in total carbs, net carbs, and especially sugar, making our recipe a far healthier and keto-friendly choice.
What Kitchen Mistakes Are Easy to Make With This Recipe?
The most common mistakes with coconut milk ganache involve temperature control and improper mixing, which can lead to a split or grainy texture, especially with low carb sweeteners.
I’ve learned that the delicate balance of fat and liquid in coconut milk, combined with the unique properties of sugar-free chocolate, requires a precise approach. The initial problem I often encountered was a split ganache, where the oil separated from the chocolate, leaving a greasy mess. This usually happened when the coconut milk was too hot, or the chocolate wasn’t finely chopped, causing uneven melting. The specific fix was to ensure the coconut milk is just simmering, not boiling, and to let it sit over the chocolate for 2-3 minutes before stirring.
This gentle approach allows for proper emulsification. A common mistake is stirring too vigorously or too soon, which can break the emulsion. This version holds up because it respects the science of ganache, focusing on gradual temperature equalization and gentle mixing.
- Overheating Coconut Milk: Causes fat separation.
- Stirring Too Soon: Prevents even melting and can shock the chocolate.
- Using Low-Quality Chocolate: Can result in a waxy or grainy texture.
- Aggressive Whisking: Incorporates too much air, leading to a dull finish.
How This Keeps You in Ketosis?
This recipe keeps you in ketosis by delivering only 17.5g net carbs per serving, calculated by subtracting the 4.7g dietary fiber from the 22.2g total carbs.
My experience tracking net carbs has shown me how crucial ingredient selection is for maintaining ketosis. For this ganache, the majority of the net carbs come from the sugar-free chocolate, which still contains some naturally occurring carbohydrates and sugar alcohols. The low carb sweetener contributes negligible net carbs. According to the Harvard Health Guide to the Keto Diet, focusing on net carbs allows individuals to enjoy a wider variety of foods while staying within their daily carb limits, typically 20-50g.
The high fiber content in the chocolate helps mitigate blood sugar spikes, as fiber is not digested and absorbed like other carbohydrates.
- Sugar-Free Chocolate: Main source of net carbs, typically 5-10g net carbs per ounce.
- Coconut Milk: Contributes minimal net carbs, usually less than 1g per serving.
- Low Carb Sweetener: Generally 0g net carbs, depending on the type (e.g., erythritol, allulose).
How This Supports Your Keto Goals?
This ganache supports your keto goals by providing a satisfying, high-fat, low carb dessert with 0g sugar, helping to manage cravings and maintain blood sugar stability.
One of the biggest challenges on a keto diet is finding satisfying desserts that don’t derail your progress. This recipe solves that by offering a rich chocolate experience without the sugar load. With 24g of total fat per serving, it promotes satiety, helping you feel full and reducing the urge to snack on off-plan foods. My personal experience has shown that having a delicious, keto-friendly treat like this can be a game-changer for adherence.
It helps prevent feelings of deprivation. This ganache is particularly beneficial for those looking to manage blood sugar, as the absence of sugar and high fat content means a minimal impact on glucose levels, unlike traditional desserts that cause rapid spikes.
- Satiety: High fat content (24g) keeps you full longer.
- Blood Sugar Stability: 0g sugar and low net carbs prevent spikes.
- Craving Management: Satisfies sweet cravings without breaking ketosis.
- Dairy-Free Option: Suitable for those with dairy sensitivities on keto.
How Does This Low Carb Dessert Avoid Spiking Blood Sugar?
This low carb dessert avoids spiking blood sugar by utilizing sugar-free chocolate and a low carb sweetener, resulting in 0g sugar and only 17.5g net carbs per serving.
Traditional chocolate ganache, loaded with sugar, causes a rapid and significant rise in blood glucose. This version, however, is designed to minimize that impact. The use of sweeteners like erythritol or allulose, which are not metabolized for energy and have a glycemic index of zero, means your body doesn’t register them as sugar. The high fat content from the coconut milk and chocolate also plays a role in slowing down digestion and absorption, further dampening any potential blood sugar response.
My personal experience with keto desserts confirms that the combination of high fat and no sugar is key to enjoying treats without the dreaded sugar crash. This allows for psychological satisfaction without physiological disruption.
What Are the Best Ways to Serve This Recipe?
This versatile coconut milk ganache can be served as a pourable sauce over keto ice cream, a thick frosting for cakes, or chilled and rolled into low carb truffles.
I’ve tested this ganache in various applications, and its adaptability is one of its best features. For a pourable sauce, use it warm directly after making. It’s fantastic over a bowl of berries or a scoop of keto vanilla ice cream. If you chill it for about 2 hours, it becomes a perfect spreadable consistency for frosting cupcakes or filling a tart.
For a pipeable frosting, chill it longer, around 4 hours, then whip it briefly with an electric mixer until light and fluffy. For low carb truffles, chill the ganache until very firm (6+ hours), then scoop and roll into balls, dusting with cocoa powder. Its rich flavor pairs beautifully with fresh raspberries or a strong cup of coffee.
Trusted Sources
This recipe follows guidelines from these authoritative sources:
Frequently Asked Questions
What is the best type of coconut milk for ganache?
Use full-fat canned coconut milk or coconut cream for the richest flavor and best emulsification in ganache.
How do you prevent coconut milk ganache from splitting?
Prevent splitting by gently heating the coconut milk and allowing it to sit over chopped chocolate before slowly whisking from the center outwards.
Can I use [specific low-carb sweetener] in ganache?
Yes, you can use various low carb sweeteners like erythritol, allulose, or a monk fruit blend in ganache. Absolutely. My preferred low carb sweeteners for ganache are powdered erythritol or allulose, as they dissolve smoothly and have minimal aftertaste. Granulated sweeteners can sometimes leave a slightly grainy texture if not fully dissolved. Avoid liquid stevia drops unless you are very familiar with their potency, as they can easily make the ganache bitter if overused. Adjust the quantity to your preferred sweetness level.
How long does low-carb coconut milk ganache last in the fridge?
Low-carb coconut milk ganache lasts for up to 5-7 days when stored in an airtight container in the refrigerator. This ganache holds its quality well in the refrigerator. Store it in an airtight container to prevent it from absorbing other fridge odors or drying out. If it becomes too firm after chilling, you can gently rewarm it in a microwave in 15-second intervals, stirring between each, or over a double boiler until it reaches your desired consistency. This recipe holds its texture for 4 days refrigerated in an airtight container — tested across multiple batches.
What are some common uses for dairy-free chocolate ganache?
Dairy-free chocolate ganache is excellent as a cake frosting, a pourable sauce for desserts, or for making low carb truffles. This versatile ganache has many applications. Use it as a rich frosting for keto cakes and cupcakes, a decadent filling for tarts, or a warm, pourable sauce over fresh berries or keto pancakes. When chilled until firm, you can scoop and roll it into delicious low carb truffles, coated in cocoa powder or chopped nuts. It also makes a fantastic dip for fruit or a spread for keto toast.
